Creating a lexer for syntax highlighting with Pygments
30 Dec 2014 | pygments, lexer, pocoo, python, coding, programming
In my last post I added a lot of Terraform code snippets. The syntax of .tf files is similar to JSON, except with less commas and built in functions. In writing the post I naively tried to use JSON syntax highlighting for my code snippets but this didn’t come out as I’d hoped. Unfortunately there didn’t appear to be a format that would syntax-highlight the configuration file in a nice way. Eventually I settled for using ‘console’ syntax highlighting which is quite plain and dull. It made me wonder how this was handled and how easy it would be to take care of this functionality myself. I quick bit of Github and Google surfing led me to Pygments which is how this is handled in my blog. I decided to have a go at creating a Terraform lexer. I thought I’d document some of my experience of this and give a quick run through of how its done.
Pygments
Pygments is basically a syntax highlighting library written in Python and developed by the pocoo team . I’d define the core functionality of Pygments as consisting of:
- Tokens - Used to define sets of programming constructs to apply to different text styles. E.g. Keywords, Types, Comments String literals etc…
- Lexers - Used to identify which parts of the text map to specific types of tokens. For example, in some languages ‘unless’ is a keyword, in others it’s not.
- Styles - Control the actual presentation of the tokens. E.g. What colour do we want the keyword tokens (as defined by the lexer)?
- Formatters - What format do we want the final output to be in? Some example formats might be HTML, JPG, GIF etc..
- Filters - As the output comes out of the lexer it is possible to mutate it in some ways. Filters take care of this. One example might be using the Gobble filter to pull out the first n characters. An example use case of this might be changing the indenting. There are a couple of filters available..
So what’s the deal with Lexers?
I’d have to assume the term ‘lexer’ comes from the lexical analysis used by compiler technology since before many of us were born. For anyone without a Computer Science background there’s a couple of phases involved in the compilation process which turns your ‘nice’ high level language code into a machine readable format. Ignoring compilation for now we can still define three main ways to look at languages from a Computer Science perspective, in order of execution by a compiler they are:
- Lexical analysis - This is the process of dividing the source code into tokens. Which groups of characters make up the keywords? Which groups or single characters are the logical/arithmetic operators?
- Syntax analysis - Here we’re concerned with the grammatical structure of the tokens. For example in all languages where it exists the if statement has a grammatical structure which is specific for the language. The syntax analysis phase might check for things like attempting to define a variable where an expression is supposed to reside.
- Semantic analysis - What is the actual meaning of each sentence defined by the grammar? From a programming perspective, at this level we might consider areas such as the final state of types after polymorphic operations have been applied.
Clearly, we predominantly care about lexical analysis. Documentation of some form makes up the main use case for Pygments. It seems like overkill to check our code snippets are semantically correct as often we only want to include a tiny portion. More importantly, we’ll often want to give examples of things that are both syntactically and semantically incorrect so we can tell our readers not to do them. That is of course assuming you are a well meaning upstanding member of the software development community!
Setting up your environment
To develop pygments you’ll need:
- Python Python 2.7.8 and Python 3.4 seem to work ok. Note that Python 3.X versions less than 3.4 are not supported and as far as I can tell there aren’t any plans to support it.
- Nose (Nicer testing for Python). It looks like the latest version at the time of writing - 1.3.4 works fine.
- A Mercurial client.
We start off by forking and cloning the Pygments project. Be advised, they use Mercurial not Git - so the commands are similar but subtly different in some ways.
Once cloned we should always make sure we can build it:
jaetech$ make mapfiles
(cd pygments/formatters; python _mapping.py)
pygments.formatters.bbcode
pygments.formatters.html
etc...
(cd pygments/lexers; python _mapping.py)
pygments.lexers.actionscript
...._
etc..
=== 354 lexers processed.
Note: depending on the time of reading you may not have 354 lexers as new ones are always being added.
Run the tests:
jaetech$ make test
Ran 1571 tests in 15.137s
....
...

OK (SKIP=8)
Ok now we’re all set up.
Writing the damn thing.
It should now be obvious each language requires it’s own lexer. So we’ll create a new file for our lexer. We’re also going to need to create an example file with some source code so we can actually test that things are highlighted as expected. Lets consider a really simply use case the Turtle programming language:
For those of you who didn’t do this at school, the basic idea is you have a turtle that you can move around with some basic commands Imagine you have this:
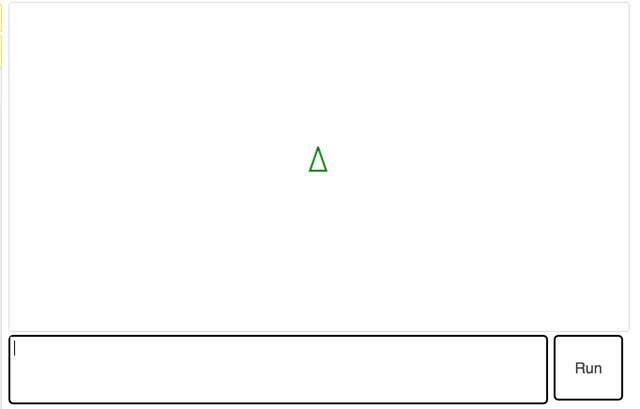
You can move the turtle forward like so:
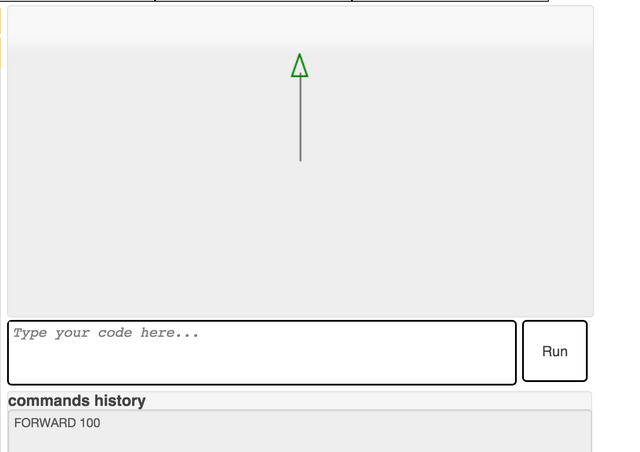
Lets create some example code in a file under pygments-main/tests/examplefiles/example.tu
The file should be set as follows:
FORWARD 100
LEFT 90
FORWARD 100
RIGHT 180
From this alone it should be obvious what the commands do.
Now let’s create create the actual lexer in a file in pygments-main/pygments/lexers/turtle.py Pygment lexers analyse languages using regular expressions. So lets form the basic class:
import re
from pygments.lexer import RegexLexer, bygroups
from pygments.token import Keyword, Number, Text, Comment

class TurtleLexer(RegexLexer):

    name = 'turtle'
    aliases = ['turtle', 'logo']
    filenames = ['*.tu']
So looking at this from the start, we obviously need to import re, as the lexer identifies tokens via regular expressions. We also import the tokens we think we will need. A full list of tokens is available here. We import the base RegexLexer class as this is the standard way of processing tokens. There are other base classes such as ProfilingRegexLexer (which shows timings for matches) but for most use cases the RegexLexer will suffice.
Once we create the class we’ll want to give it a name I chose ‘Turtle’ here. Then a list of aliases that can be used to lookup the lexer. Other classes looking for our lexer may call pygments.lexers.get_lexer_by_name() so it’s important to include aliases here. Note that the filenames are also similarly important when pygments.lexers.get_lexer_for_filename() is called.
Note: .tu is a made up extension for the purpose of this example
So now we need to make our lexer actually do something. Looking at our source we can see that there’s a very simple structure to our turtle code, it’s just one of three keywords, followed by a number. So now it’s possible to define a regular expression that covers this. Appending onto our Turtle Lexer we get:
tokens = {
       'root': [
            (r'\bFORWARD|LEFT|RIGHT\b', Keyword),
            (r'\d', Number),
       ],
}
The tokens hash represents a set of states. A state consists of a regular expression, a token and optionally a new state to transition to. In our example above we do not transition to a new state (this is covered later). Throughout the example we simply work in one state named ‘root’. The idea of this is that it will work from the ‘root’ state and first look for one of FORWARD, LEFT or RIGHT. If one of these tokens is matched it will mark them as keywords.Otherwise it will look for a number. It’s important to note that this is an iterative process so we do not need to express the number regex as \d* .
To view how the syntax highlighted document looks we run:
./pygmentize -O full -f html -o /tmp/example.html tests/examplefiles/example.tuThis will create an output file named example.html from our example.tu file. If we open example.html in a web browser we will see that we have forgotten to tokenize whitespace characters and hence they are marked as errors.
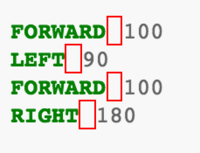
So we simply add:
(r'\s', Text),To our lexer, regenerate the HTML file and say goodbye to the errors:
Also worth pointing out the that the ‘Text’ token is useful for generic things like whitespace that don’t require and real formatting.
State Changing.
So far we’ve only worked from one example. However, as languages get more complicated it becomes a lot harder and in some cases impossible to describe lines on the basis of a single regex. For example what happens if we have C-like comments?
/*
This is a comment
*/
We can achieve this by manipulating the state stack. We could attempt it like this:
tokens = {
       'root': [
            (r'\bFORWARD|LEFT|RIGHT\b', Keyword),
            (r'\d', Number),
            (r'\s', Text),
            (r'/\*', Comment.Multiline, 'comment'),
       ],
       'comment':[
            (r'[^/*]+', Comment.Multiline),
            (r'/\*', Comment.Multiline, '#push'),
            (r'\*/', Comment.Multiline, '#pop'),
            (r'[*/]', Comment.Multiline)
       ],
}
Our lexer scans the strings in the text. Once it encounters'/*'it not only ensures that the token is set to a multiline comment but transitions to the comment state. This is meaning that from here on the tuples in the ‘root’ state will be ignored and we will only match using the comment state. As the first'/*'has been matched in the root state we move downwards from the top tuple (as we did in the root state). The first regular expression says that everything that isn’t'/'or'*'should be set formatted with the multiline comment token. The next two lines introduce some magic.
Pushing/Popping states
In the above example we change state when we enter comment mode. Clearly we need a way to exit the state once we encounter'*/' otherwise we will continue marking things as multiline comment mode. The pop action will remove the latest state from the stack. Therefore once executed it will stop us working within the ‘comment’ state and we will go back to ‘root’. In our case this is called once we encounter the end of comment symbol.
Although we now have a way of marking:
/*
This is a comment
*/
There is one edge case which needs to be considered. What about a comment like this (which is perfectly legal syntax)?
/*
 /* This is a comment
 */
*/
EDIT: Check the last character - oh dear! This works via pygments but not in my blog for some reason!
We can see that this form implies recursion this is where the'push'operator comes in.
Every time we encounter '/*' we push the comment state back onto the stack, i.e the stack will look like this after we’ve pushed the comment state back onto it:
-->  |------ comment
     |------ comment
     |------ root
This allows us to only exit comment-mode when appropriate.
Matching tokens by group.
Sometimes we’ll want to set a number of tokens in a single regular expression. If you remember earliar we had a very simple structure for our turtle programming language. Lets rewrite that so we mark the tokens with a single regular expression. We’re going to introduce some more magic in the form of the 'bygroups()' method.
       'root': [
            (r'\b(FORWARD|LEFT|RIGHT)(\s+)(\d+)', bygroups (Keyword,Text,Number)),
            (r'\s', Text),
            (r'/\*', Comment.Multiline, 'comment'),
       ],
The bygroups operator uses each group given by parenthesis and applies the tokens to them in the order the regex is matched.
This was a really quick introduction to Pygments lexers, there’s far more examples, but the best way to take this further is clone the pygments-main repository and start looking at some of the other lexers.
Remember before deciding that development on your lexer is complete you should always run all of the tests